How to Install the Dreamwell Pixel
Track performance across all your campaigns by installing the Dreamwell pixel.

For Shopify
The Dreamwell Pixel allows you to track and measure the success of your influencer marketing efforts across various channels. This guide will walk you through the steps to install the Dreamwell Pixel on your Shopify store.
-
Locate the Dreamwell Pixel
The Dreamwell Pixel can be found in your performance settings. There you'll find a unique pixel associated with your Dreamwell account. This code snippet will be used to link your website with Dreamwell's tracking system. -
Copy the code snippet
Click “Copy Shopify Pixel” and this will automatically copy the code to your clipboard. -
Log into your Shopify Admin
Now you need to add the Pixel to your Shopify store. To do this, first, log into your Shopify account. -
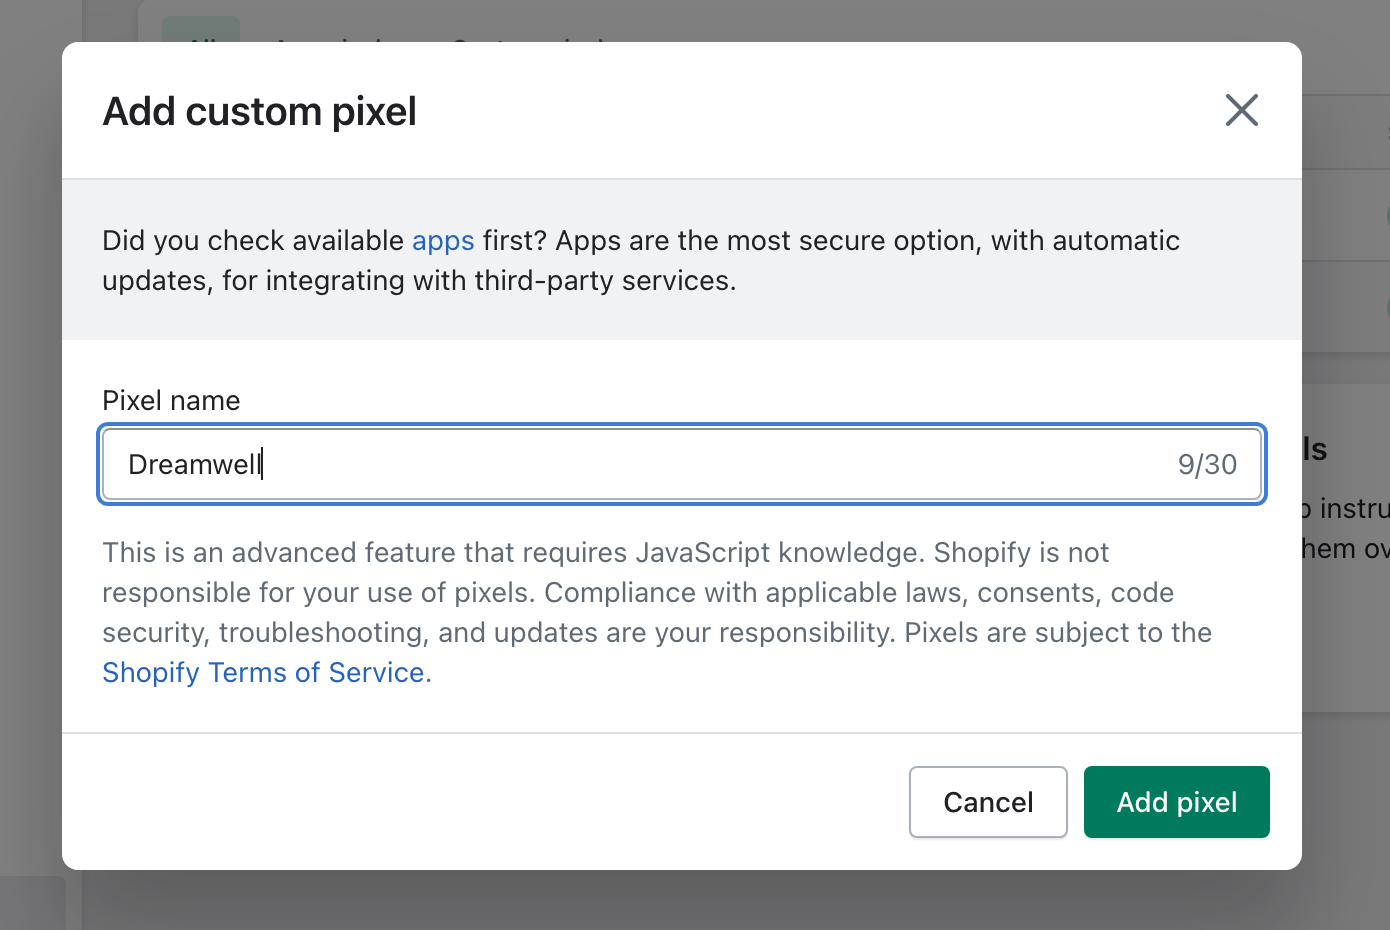
Navigate to Settings > Customer events
Once logged in, navigate to the "Settings" section in your Shopify admin panel. In the side menu, select "Customer events". Click “Add custom pixel” and call it Dreamwell.

-
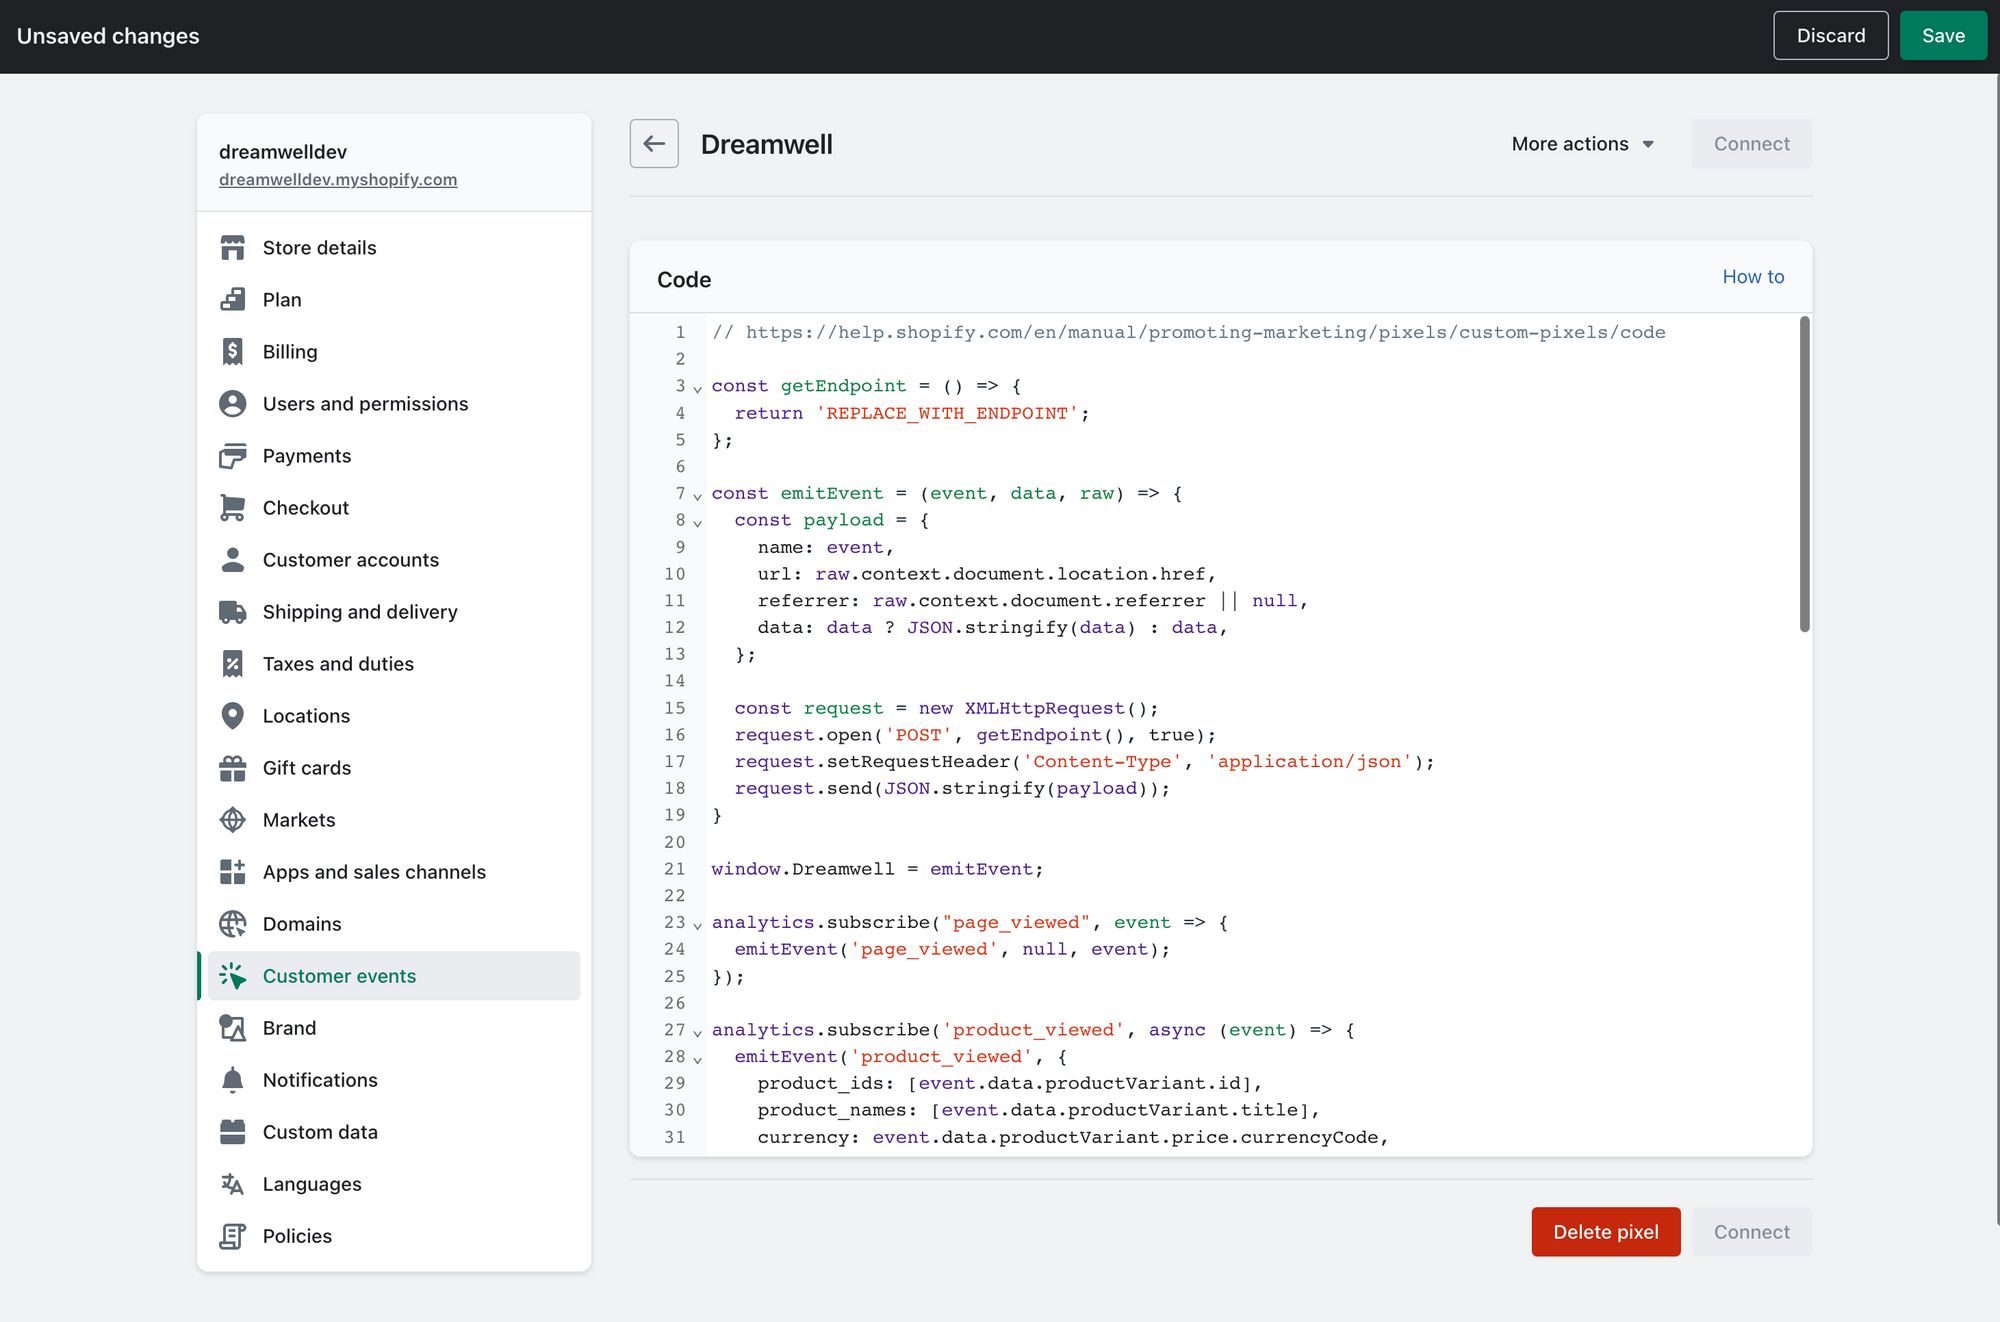
Paste the Pixel Code
Click into this box and paste the Pixel code that you copied from your Dreamwell dashboard. You can right-click and select “Paste” or use the keyboard shortcut Ctrl+V (or Cmd+V on a Mac).
-
Save Your Changes and Connect
Once you've pasted the Pixel code, click ”Save” at the top-right of the page, then hit “Connect” to start tracking events.
Your Dreamwell Pixel is now installed on your Shopify store, and you'll be able to track, measure, and optimize your conversions directly from your Dreamwell dashboard! None of our brands typically need to update their privacy policies, due to our privacy-safe, cookie-less tracking, but please contact support if you have any questions.
For All Other Sites
Customers not on Shopify will need to install the code snippet manually in the <head>...</head> tag of their website. Once installed, conversion events will also need to be connected to your preferred user actions.
- Locate the Dreamwell Pixel
The Dreamwell Pixel can be found in your Dreamwell account settings. Navigate to the section labeled "Performance" and there you'll find a unique code snippet associated with your Dreamwell account. This code will be used to link your website with Dreamwell's tracking system. - Copy the code snippet
Click “Copy General Pixel” and this will automatically copy the snippet to your clipboard. - Add the snippet to your website
Paste the code into the<head>tag of your website. This will help measure brand deal performance. - Define conversion events
Attach event listeners to user actions that you define as conversions. This is made easy with thewindow.Dreamwellfunction. You may require the help of a developer or feel free to contact our support for assistance.
These examples are included before the end of the body () tag.
Example: Trigger a checkout event.
<script type="text/javascript">
(() => {
    window.Dreamwell('checkout_completed', {
        value: 100.00,
        currency: 'USD',
    });
})()
</script>
Example: Trigger a sign up event.
<script type="text/javascript">
(() => {
    window.Dreamwell('signed_up', {
        value: 1.00,
        currency: 'USD',
    });
})()
</script>
Example: Trigger a custom event on form submission.
<script type="text/javascript">
(() => {
	var el = document.getElementById('email-form');
	if (el) {
		el.addEventListener('submit', () => {
            window.Dreamwell('early_access_form_submit', null)
        });
	}
})()
</script>
With your pixel now installed, any links from the Dreamwell platform will have accurate ROI using our privacy-friendly, cookie-less tracking methods! None of our brands typically need to update their privacy policies, due to our safe tracking nature, but please contact support if you have any questions.